Elektron Octatrack DPS-1 Audio Input/Output Repair
Secondary Market Problems Aren’t Excellent
I bought a used Elektron Octatrack DPS-1 on Reverb in the spring of 2023. The condition of the device was listed as “excellent”, and it seemed that way. By the time I had the hang of the device, I noticed the audio connections were spotty. Volume was inconsistent, and messing around with the connections gave me static and changing volume. I was sure that I had bought a $1,000 dud.
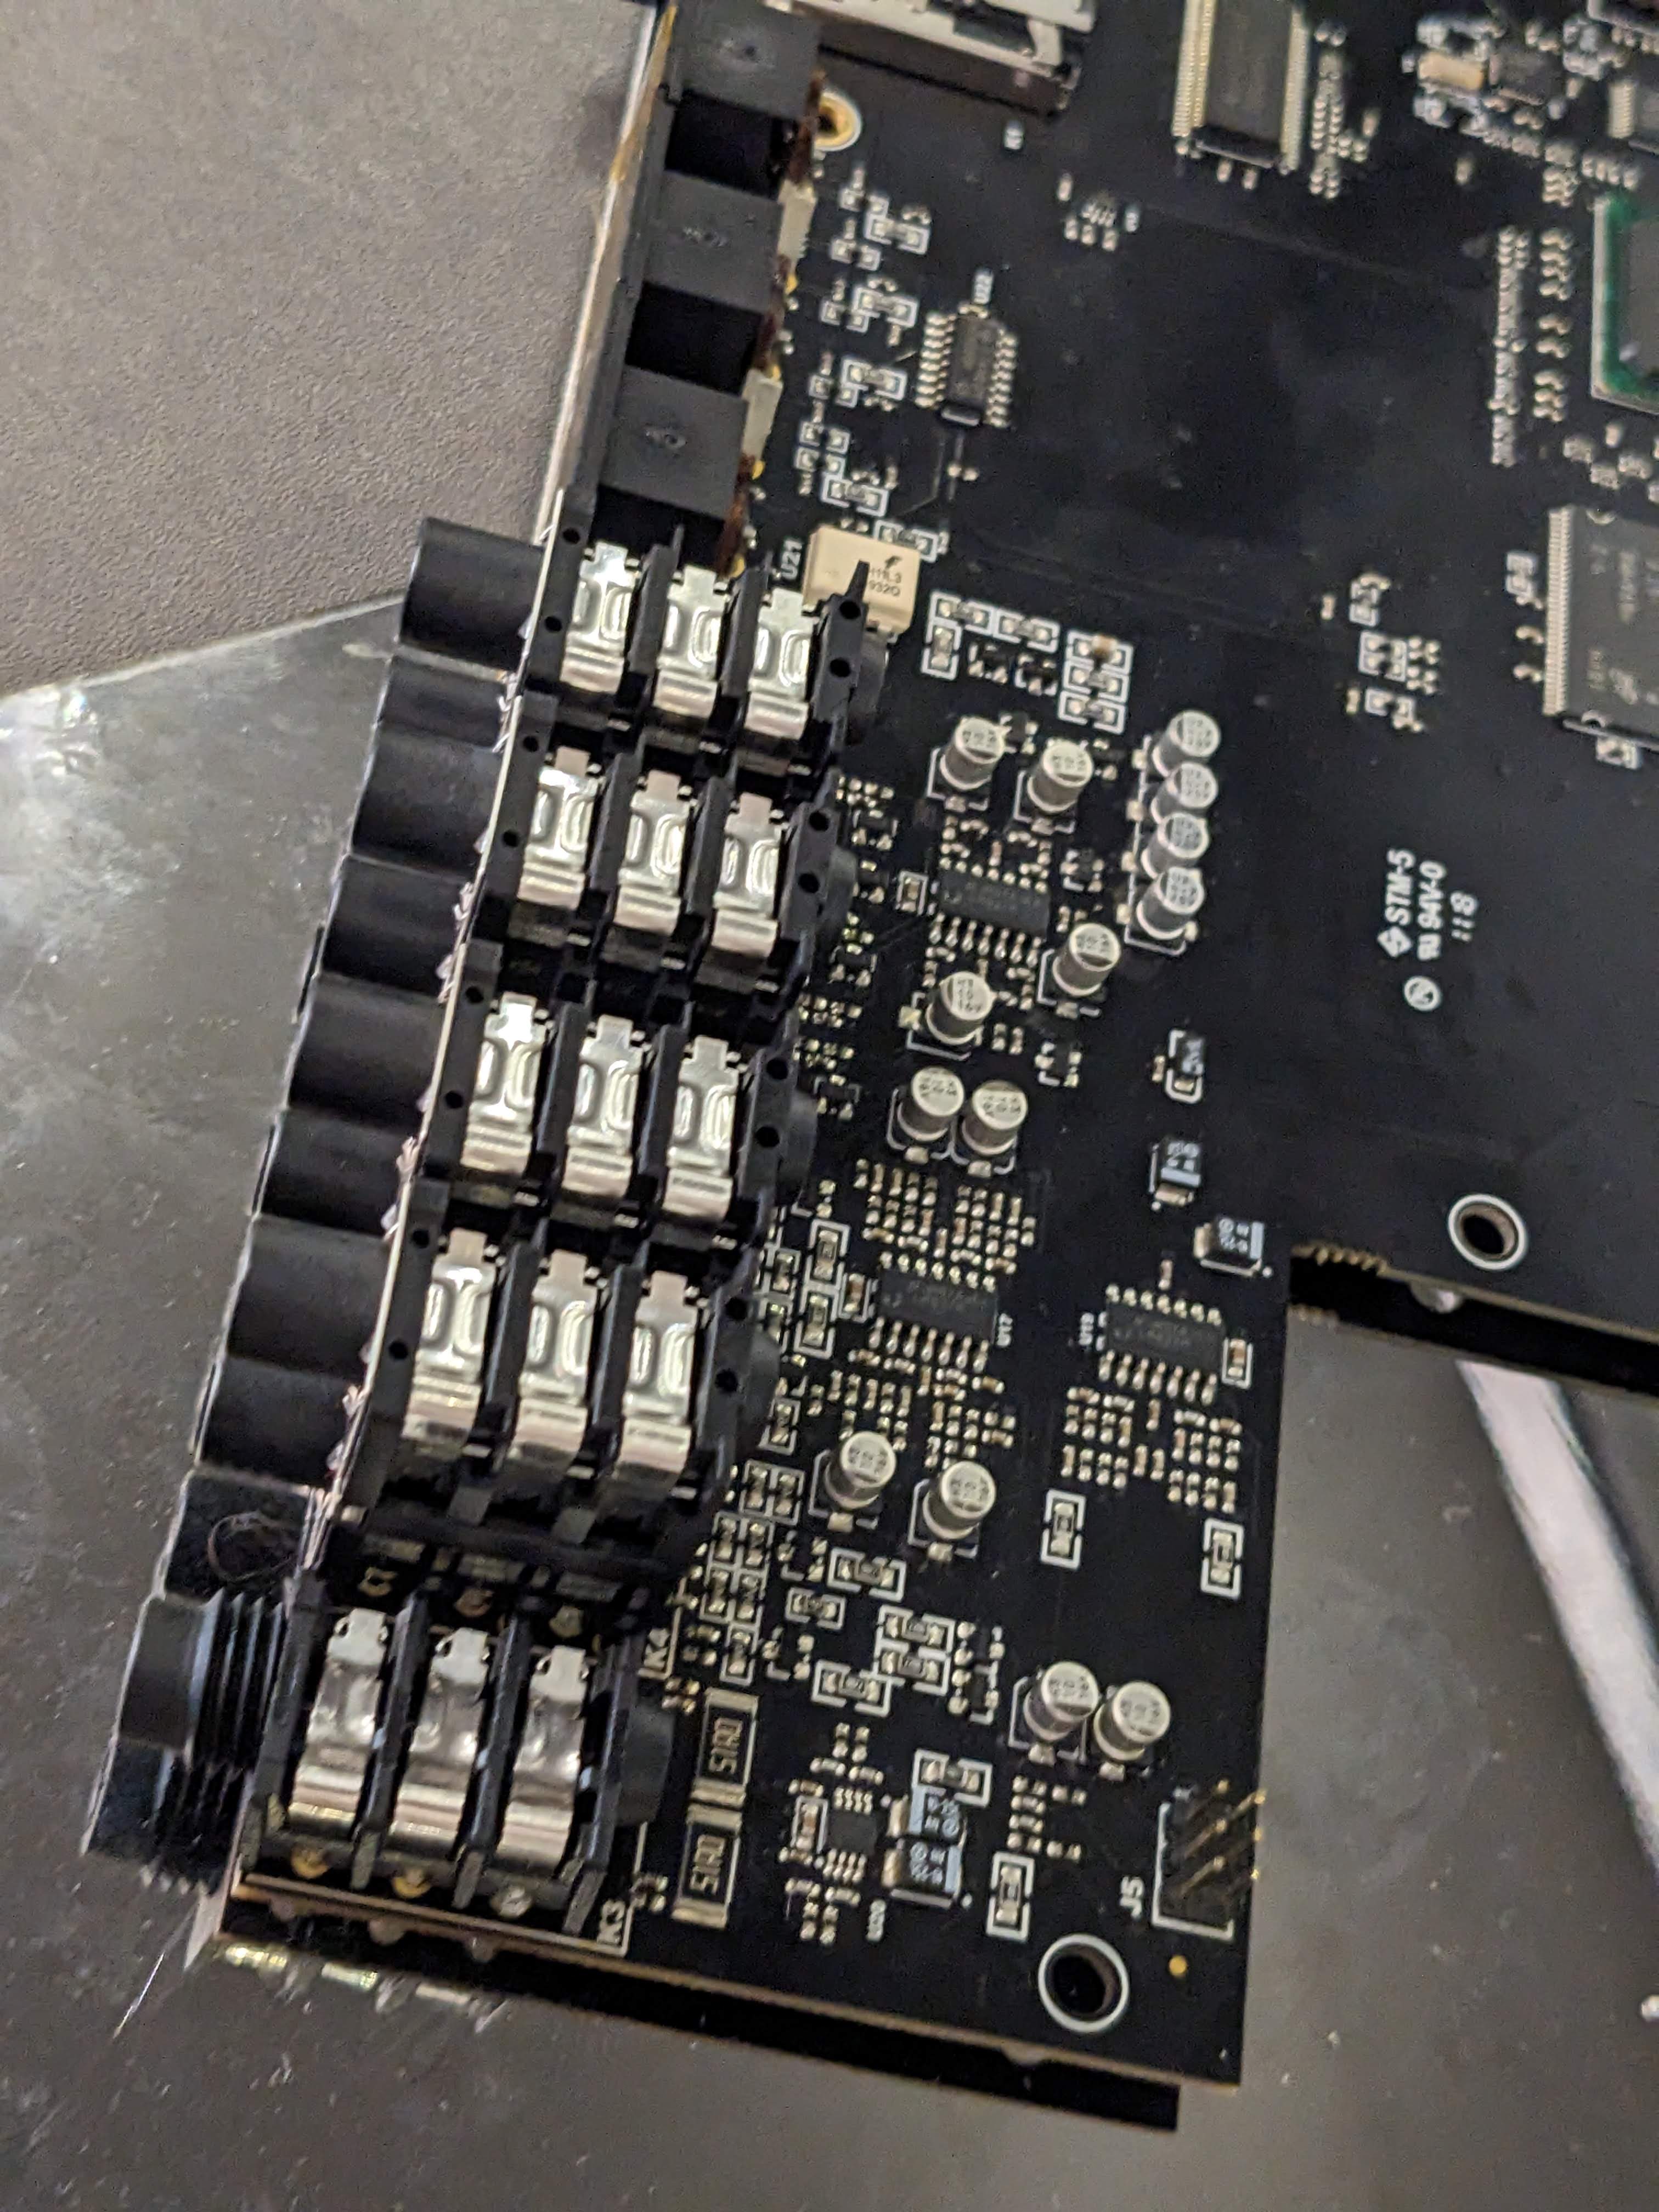
I opened it up, and the picture below is what I saw.
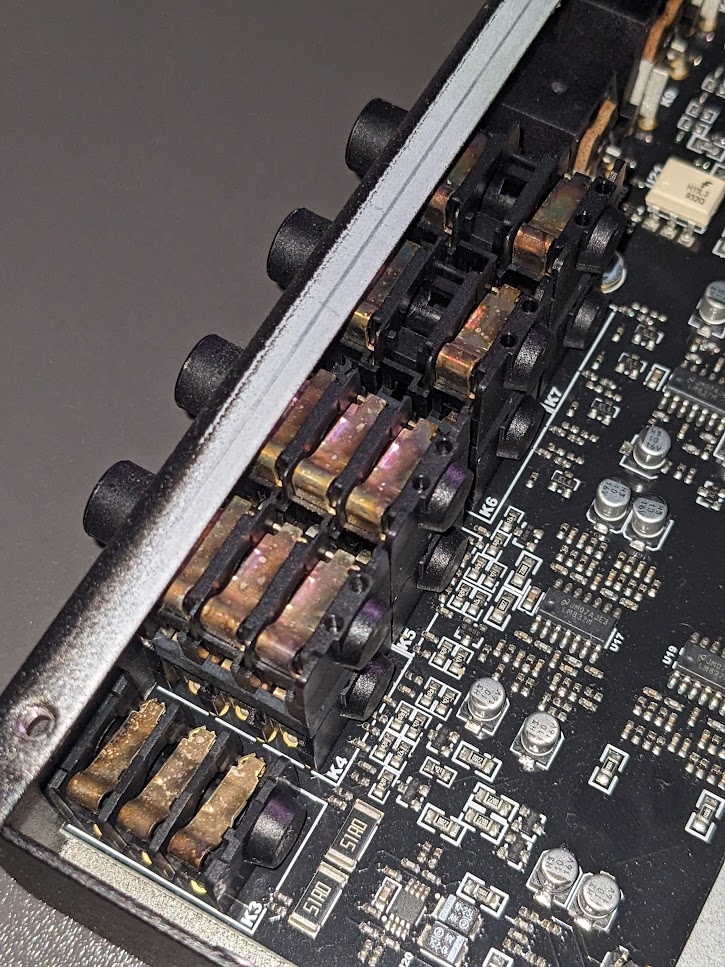
The audio connections were badly corroded. I don’t know what the original ports were made of, but the new ones are bronze coated with silver and appropriately shine like something coated in silver. These have lost all of their shine; if there was a protective layer it’s gone and has been replaced by spotty pockets of oxide layer.
I contacted Elektron for some advice, I also shared a picture of the interior.
Yes, its a quite common fault with the old ones Cleaning and resoldering usually makes it good.
Elektron Repair Employee
I contacted the seller, as this was not a device in excellent condition. They also suggested cleaning the contacts.
Could you try a contact cleaner to knob & jack?
Reverb Store User
I might be a fool, but I didn’t think this suggestion was very good, even though the manufacturer and seller both told me the same thing. In my view this is very severe corrosion; casual cleaning without disassembly wasn’t going to do it.
I was not able to find any help online about repairing these devices; I hope this post helps someone else out there.
I have some tools for working on electronics equipment. I’m not an expert at using them, but this seemed like a great time for some experience. I wanted to restore this device to excellent condtion, and to do that I had to remove the connctions. Then I could clean them more throughly, or replace them.
I asked for and recieved a $200 refund; which I thought would be enough to cover the cost of repairs. It did not cover the risk of destroying the device.
Repair Process
Tools
To open the device, these tools were required:
- T-10 and T-8 “security” screwdriver bits - the same sort that are used for cell phones.
- A smallish phillips screwdriver. The one I used was not labeled with a size.
- Cable cutters with a soft grip, which I used to pull out the power board connection.
After reading Neutrik on the connectors and consulting their product guide, I identified the needed replacement parts:
- One Neutrik NRJ6HH connector (this is the headphone jack)
- Four Neutrik NSJ12HC connectors
I was able to buy these from https://www.mouser.ca for a reasonable price, relative to the cost of the device.
To install the replacement parts, I needed:
- A hot-air rework station
- A nozzle capable of blowing air on all of the connector pins at once
- Heat-resistant gloves (I used Weller WLACCSG-02 gloves)
- Polyimide tape
My hot air rework station is the 303D from SparkFun. The standard nozzles were useless for this project; so I purchased an Adafruit 10-piece hot air rework soldering nozzle kit with my Mouser order. I wasn’t certain these would fit my unit; I estimated the size using the marketing photos and it seemed like a good bet, which luckily paid off.
PSA
The Adafruit 10-piece hot air rework soldering nozzle kit fits the SparkFun 303D hot air rework station.
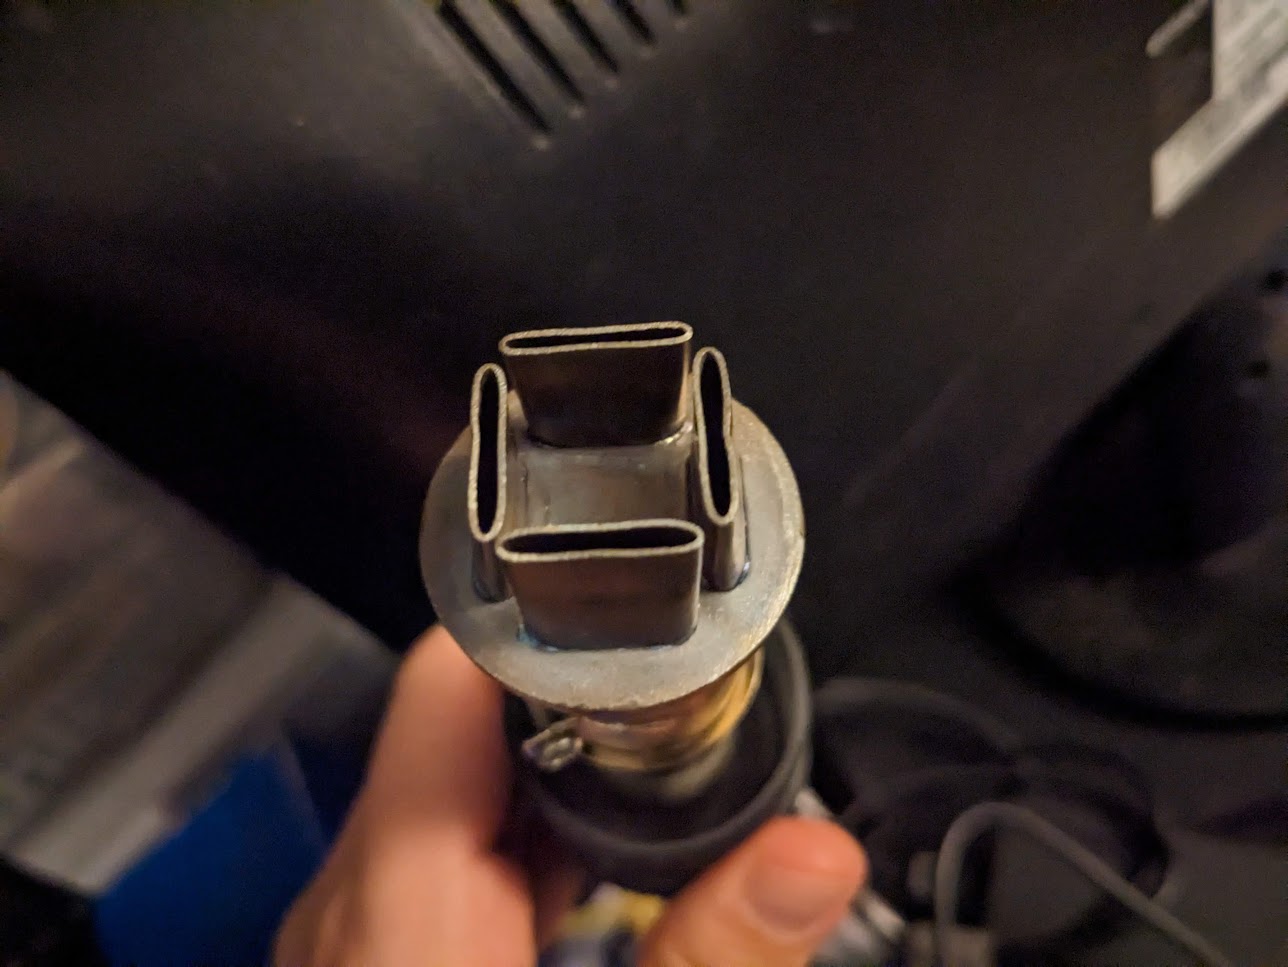
Minimal Costs
- The connectors cost me $41 CAD.
- Extra tools I didn’t have cost me $100 CAD.
Total required cost was $141 CAD - I was within the budget, though I was valuing my labour at zero and was not at all compensated for the risks involved; both my fault.
Removing Connections
First, I fully removed the board that housed the connectors from the rest of the device. The power connector is stiff and difficult to remove, I used a tool. After you get all the screws out there’s still a plastic nut on the exterior of the device on the headphone jack that has to be removed.
I covered the area around the pins I’d have to melt with polyimide tape to protect the board. I’m not sure this was necessary, but it was a cheap hedge against my lack of experience with hot air rework. I think it was important for protecting any plastic, the temperatures I was using were twice what it would take to melt them.
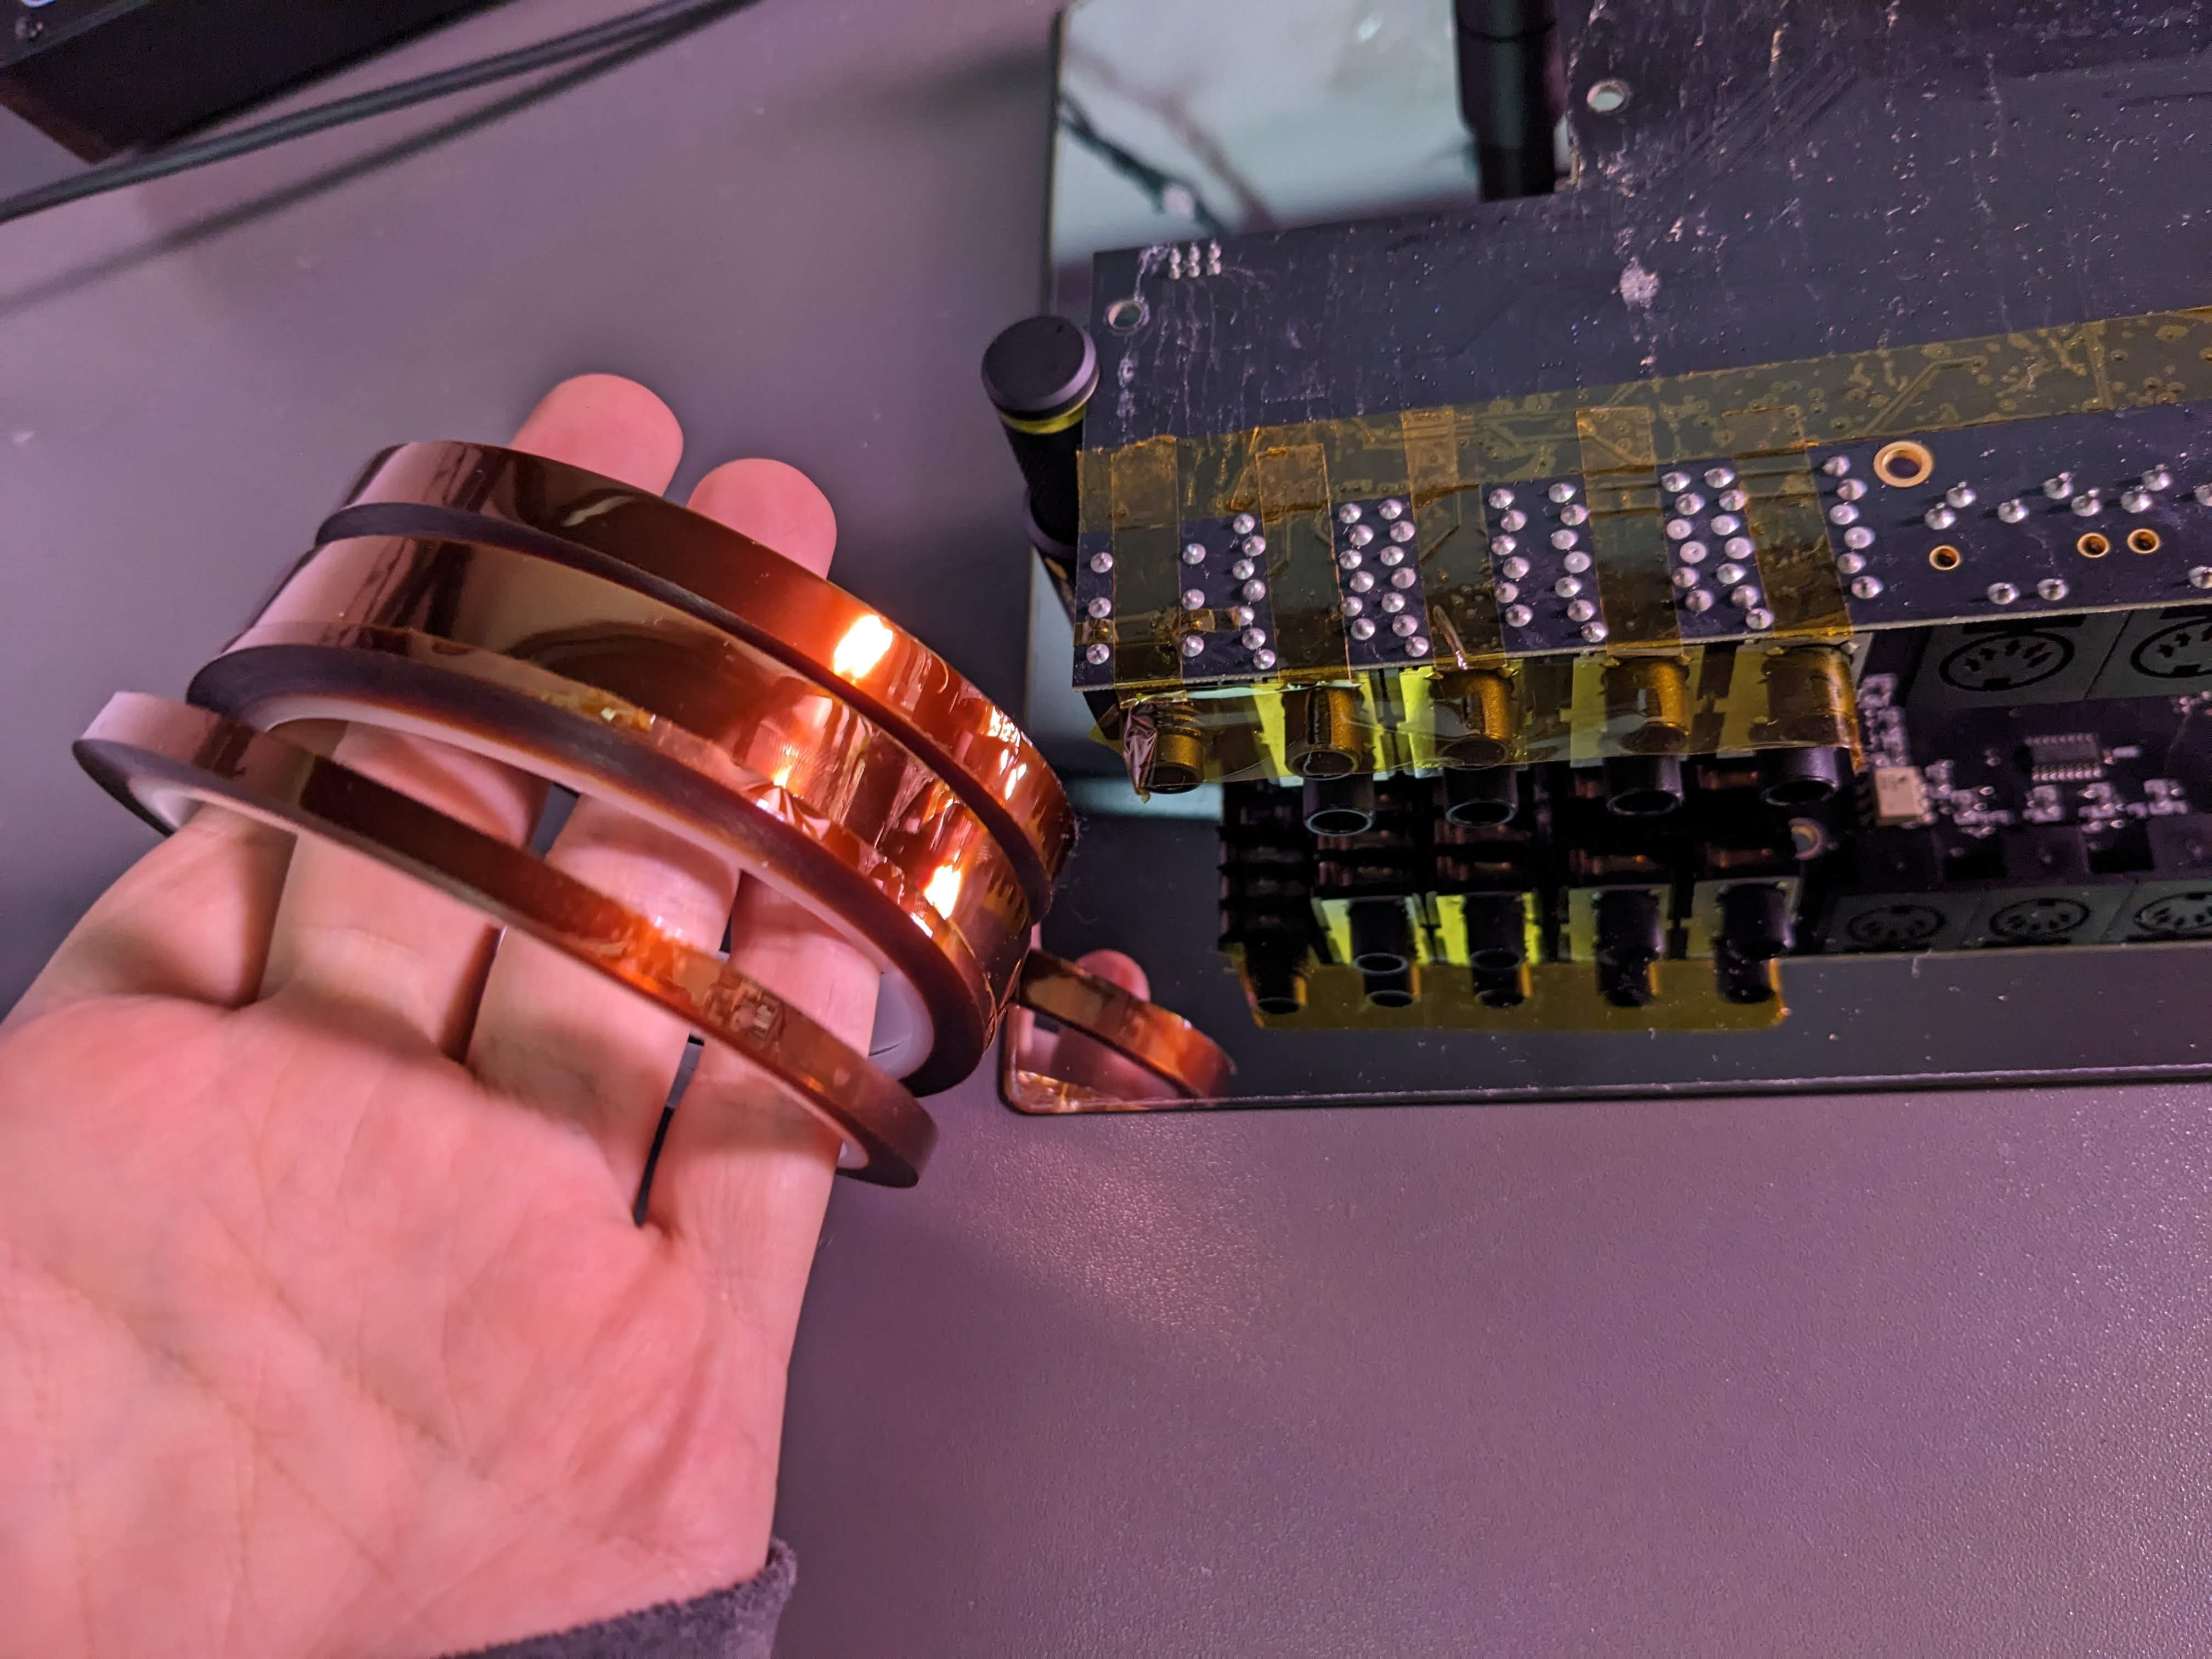
Next comes the hot air rework station. You have to be able to pull the connector out as you are applying heat. To do that I held the board in my hands (protected by the heat resistant gloves). Be very careful where you point that nozzle.
I had to use the highest temperature and air flow settings to get the solder to melt. I would not suggest starting there, there might be a good reason why I had to do that. Applying flux may have helped, but clean it up before using hot air or you’ll make a mess.
It is very important to have the appropriate nozzle. I tried with small cylindrical nozzles and made zero progress that way, it was very frustrating.
Replacing Connections
The NSJ12HC stacked connections I purchased to replace the audio inputs were not technically appropriate for two of them. These replacement connectors have tip, ring, and sleeve (TRS) contacts. The A, B, C, D inputs on the Octatrack don’t have a ring contact. Luckilythese connectors seem to be perfectly compatible with no issues at all. There are enough through-holes to accomidate their 12 conductors even though they are not all being used.
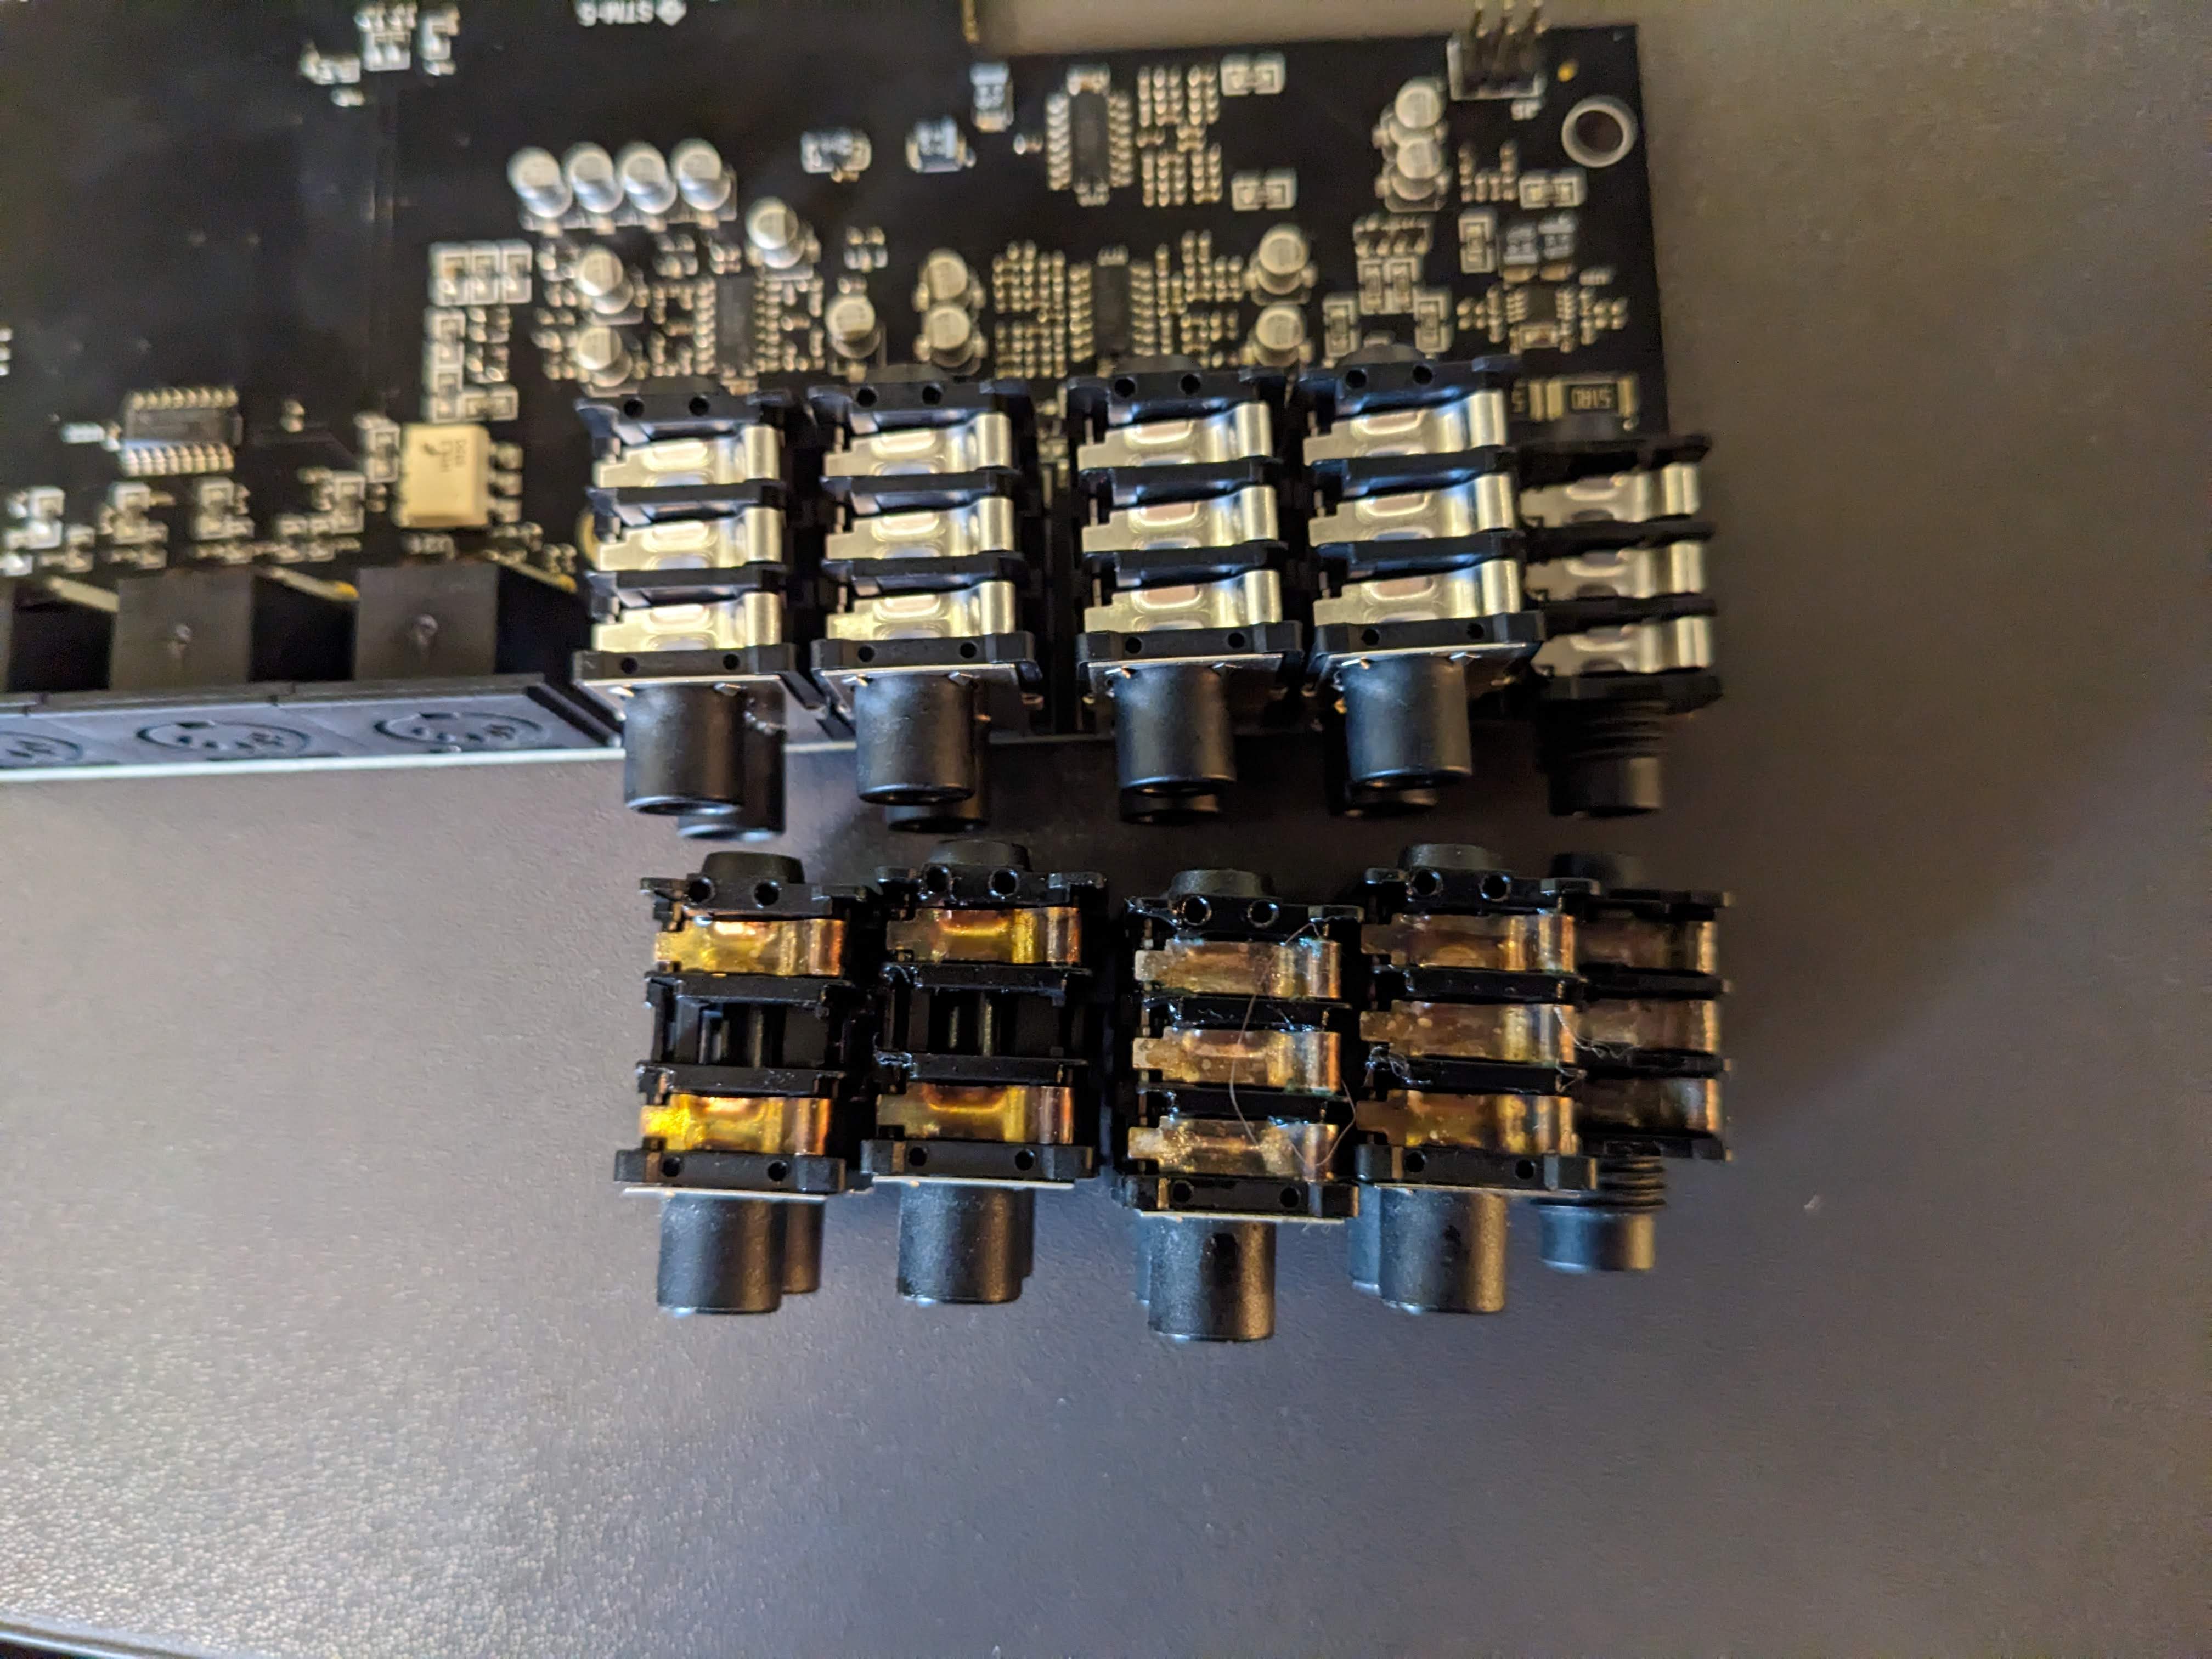
I had some trouble with one of the connectors showing a short. When audio was played into the C port, some signal was also being shown on D (seen via the LEDs). The audio volume on C was less than it should have been. I ended up removing the port completely, smacking it around to remove lose solder balls, and cleaning the board surface with high purity isopropyl alcohol. I’m not sure which of these things fixed it, but my multimeter showed no shorts and the problem was resolved.
Conclusions
In my opinion this repair is entirely doable by someone with the right equipment. It was difficult for me for a long time, but once I had the right nozzle and appropriate gloves it was easy. It’s not a zero-risk repair - you could burn yourself or your board.
Returning the device was always an option. I was confident that my plan of action would succeed in creating a Octatrack DPS-1 in perfect condition; if I had returned it I would have to buy another used model. If what the Elektron employee told me is true, then this probably would not have solved the problem.
When I bought an excellent condition unit, I was determined to have that. Now I have the satisfaction of knowing that I’ve improved the condition myself, to a level that might be unmatched on the used market. I will never have to mistrust the quality of my audio connections; if I had used the cleaner it would always be in doubt.
If the latest version of the Octatrack wasn’t $1,000 more than this model, that probably would have been a better approach. I just couldn’t justify that cost difference.
