Keystep Pro Drumbrute Impact Key Labels
Motivation
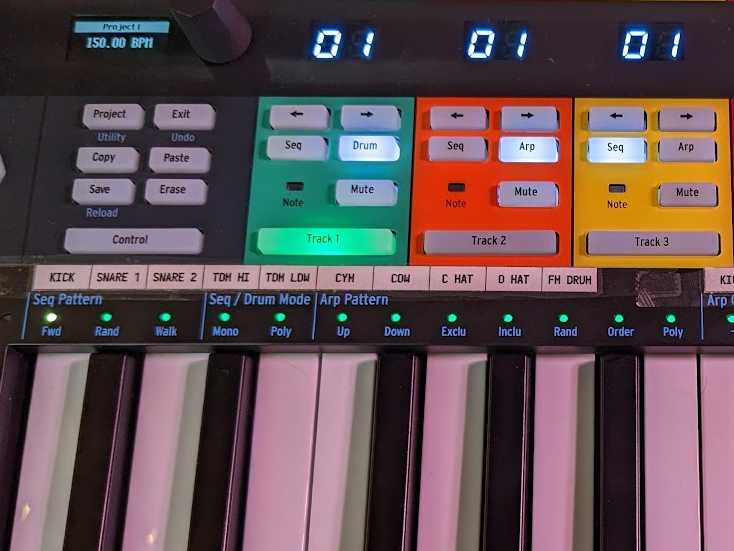
I have a Arturia KeyStep Pro that I am using to sequence an Arturia DrumBrute Impact. They KeyStep Pro has a dedicated sequencer for drums (“Track 1”), but the keys are not labelled. This makes it a bit cumbersome to know which key to hit if you want to add some more cowbell, or whatever.
Solution
I made a simple overlay that can squeeze above the keys; it’s not fancy but it works. The finished product is shown below.

Printing Precisely Is Surprisingly Difficult
There’s a trick to getting this printed perfectly: setting your printer’s DPI correctly, and configuring the image’s PPI correctly. DPI indicates how many drops of ink the printer is capable of squeezing into an inch, and PPI is how many pixels can be represented per inch. The latter I determined for my own printer by printing a calibration image from Roger N. Clark. According to R.N. Clark:
The ppi resolution of images it prints can be no better than half the specified dpi of the printer.
So I configured my printer to print at its maximum resolution of 1200 DPI (should see this maximum in the Printer Properties dialog) and told my image manipulation software (GIMP) that R.N. Clark’s test image was half that - 600 PPI. I printed the image and I found that only the 4 px lines were crisp in the print out, so I divided 600 PPI by four to reach a final PPI setting of 150 PPI.
Final Product
Here’s the GIMP project file I used to create this image: download. A PNG export is available here.
